dotCMS offers a robust and granular system for localization through locales, which are typically defined according to a combination of a language code and a country code (e.g.: en-us, en-gb, es-es, es-cr, etc).
The use of locales allows for multiple interpretations of the same language, capable of respecting regional and dialectal distinctions. While these can be complex topics in their own right, management of locales in dotCMS is straightforward.
The Locales Tool
Adding the Tool
Depending on your version of dotCMS, the Locales tool may be enabled by default, or may require manual addition. To add the tool, browse to System -> Roles & Tools, select the tools tab, and choose the tool group to which you wish to add Locales. Select it from the dropdown.
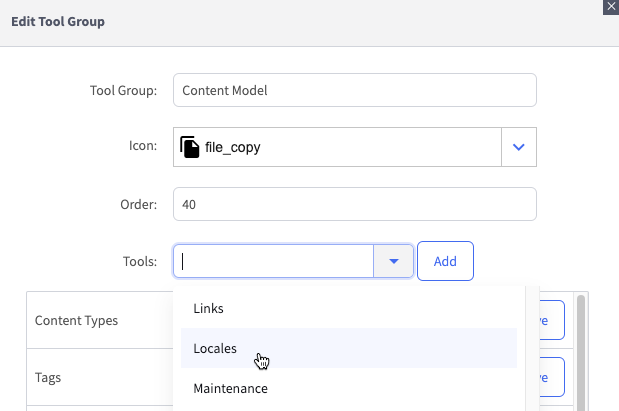
Finally, click Add and then Save the tool group.
Adding or Editing a Locale
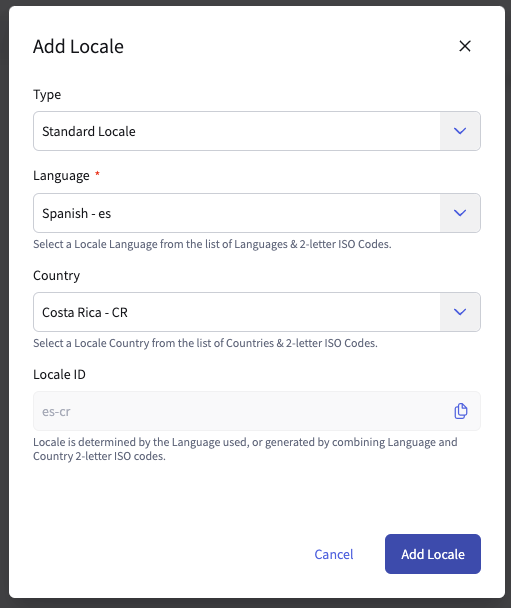
To add a locale, click the Add Locale button at the top right corner. This opens the Add Locale dialog:
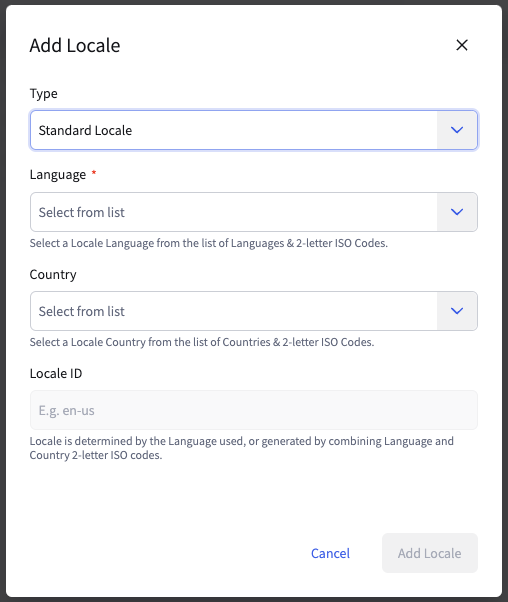
This contains several data fields:
| Field | Type | Description |
|---|---|---|
| Type | Dropdown | Select either Standard Locale or Custom Locale. This selection changes the fields immediately below. |
| Language | Dropdown + Filter | Standard Locale only. This allows you to select a language code from a list of IETF language tags. |
| Country | Dropdown + Filter | Standard Locale only. This allows selection from a list of ISO 3166 alpha-2 country codes. |
| Locale ID | Text | In Stanard Locale, this is a read-only field that represents the outcome depending on the selections of Language and Country code. In Custom Locale, you may manually enter a locale identifier, which should still follow the format guidelines specified — i.e., two two-letter abbreviations joined by a hyphen. |
| Display Name | Text | Custom Locale only. Manual name input for the custom locale. |
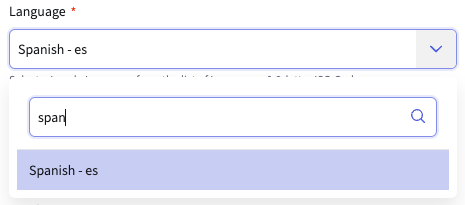
The Language and Country fields contain a text filter for convenience.
A completed entry might look like this:
Finally, click Add Locale and the new entry will be added to the list.
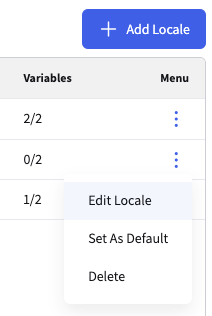
To edit an existing entry, click on its row or select Edit Locale from the “kebab” menu to the right (⋮).
Setting a Default or Deleting
To set a locale as the system default, simply select that item from the kebab menu.
Likewise, deletion is also possible from that same menu. However it is not possible to delete a default locale; another locale must be named as default, first.
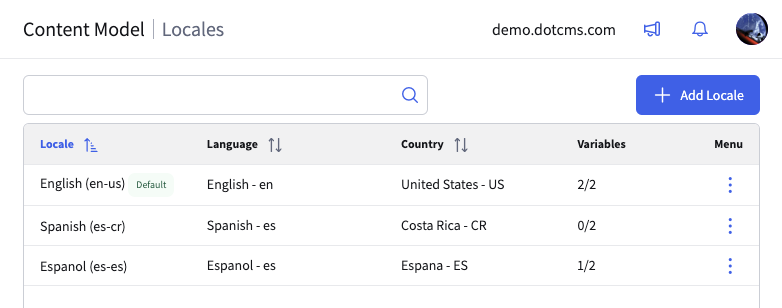
Variable Count
Each row representing a locale contains a “Variables” count, represented as a fraction. The denominator represents the sum collection of Language Variable contentlets; the numerator shows how many of those variables have a language version for the locale.
Our example system has two language variables and three locales. Both language variables are represented in the default locale; one variable has a translation for a second locale, but not the third. The result, also seen at the top of the page:
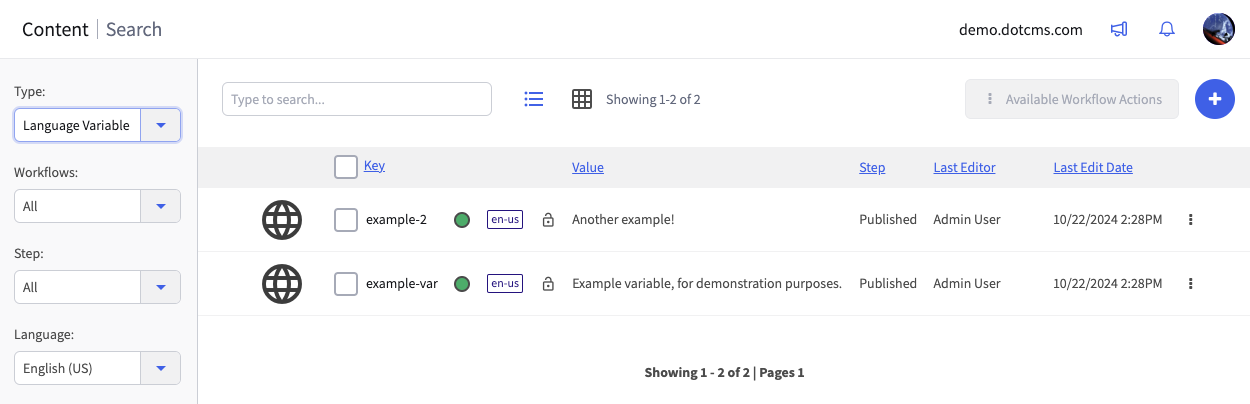
The Language Variable content type is included in dotCMS by default. To learn more about the handling of the language variables, see Global Language Variables.
To add a custom content tool — i.e., a quick navigation link to contentlets of this type — you can open the Languagevariable content type and click the Add to Menu button in the upper right corner. For more on custom content tools, see the linked section of Custom Tool Groups.